-->

Ubuntu Hardy Heron Alpha 3

Rilasciata la terza alpha per Ubuntu Hardy Heron.

La notizia al completo:
Introduction

The Ubuntu developers are moving very quickly to bring you the absolute latest and greatest software the Open Source Community has to offer. Hardy Heron Alpha 3 is the third alpha release of Ubuntu 8.04, and with this new alpha release comes a whole host of excellent new features.

Note: This is still an alpha release. Do not install it on production machines. The final stable version will be released in April 2008.

In General

These features are showcased for your attention. Please test them and report any bugs you find. If you want to see what the developers have cooking for the next alpha release take a look through the hardy blueprint page https://blueprints.launchpad.net/ubuntu/hardy

Upgrading from Ubuntu 7.10

To upgrade from Ubuntu 7.10, run "update-manager -d" using the update-manager package from Gutsy.

Xorg 7.3

The latest Xorg is available in Hardy, Xorg 7.3, with an emphasis on better autoconfiguration with a minimal configuration file.

Linux kernel 2.6.24

Alpha 3 includes the 2.6.24-3.5 (2.6.24-rc6-based) kernel. This brings in significant enhancements and fixes that have been merged in the last few months into the mainline kernel. Among these is the introduction of dynticks support for amd64, bringing the same power savings already available on 32-bit systems to 64-bit laptops and desktops.

PulseAudio

Alpha 3 includes PulseAudio enabled by default. Some non-GNOME applications still need to be changed to output to pulse/esd by default and the volume control tools are still not integrated. https://blueprints.launchpad.net/ubuntu/+spec/cleanup-audio-jumble

PolicyKit

With Alpha 3, PolicyKit integration is gaining visibility in the administrative user interfaces. PolicyKit makes it possible to run administrative applications as a normal user, and have them get a particular set of extra privileges for certain operations, which allows fine grained control over user permissions and enhances usability, as well as eliminating the security implications of running the whole application as root.
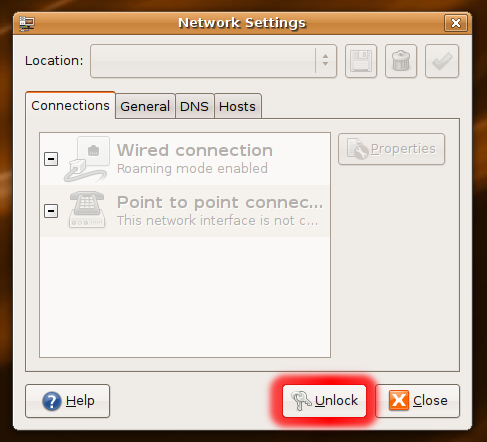
alpha3_polkit5.png

For details of PolicyKit integration in Hardy, refer to the policykit-integration blueprint.

Firefox 3 Beta 2

The latest Firefox 3 beta comes with Alpha 3, bringing much better system integration including theming that mirrors the system such as icons and colours as well as having GTK2 form buttons and open dialog.
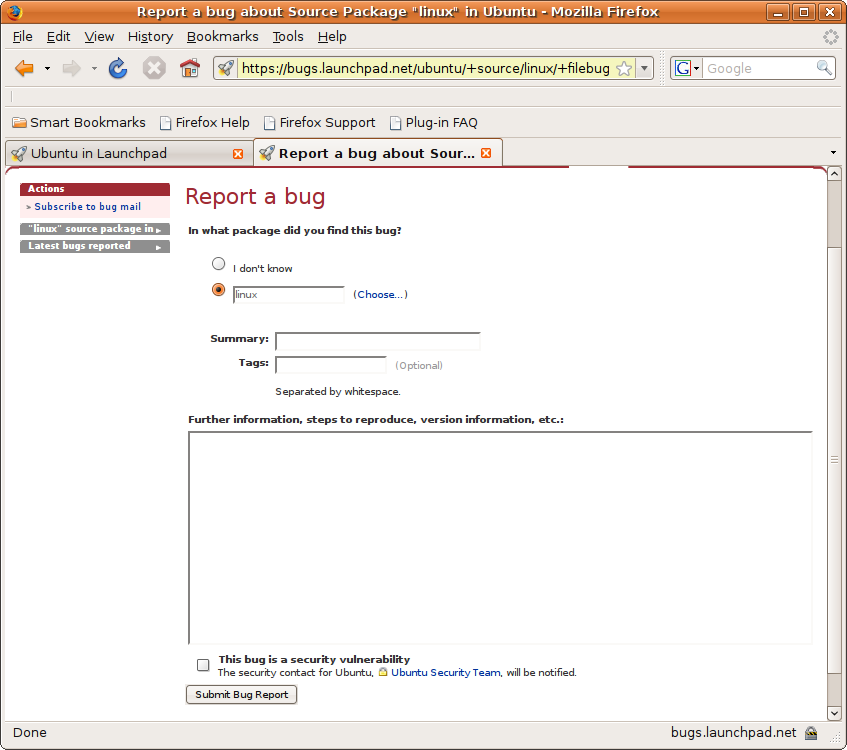
ff3-screenshot.png

You can read more about the work on the Fox and Penguin blog post by Michael Ventor, a Mozilla intern.

Download Alpha 3

Get it while it's hot. ISOs and torrents are available at:

Konserve, applicazione di backup per KDE

Piccola applicazione di backup
Licenza: GNU General Public License (GPL)

Konserve
è un'applicazione per KDE 3.x che consente di effettuare copie di backup. Lavora in background nel system stray ed è in grado di creare copie di backup a intervalli regolari di numerose cartelle e files.

Bug corretti in questa versione:

Konserve adesso rispetta un intervallo molto più lungo tra un backup e l'altro
La funzionalità di backup delle cartelle funziona nuovamente
Corretto problema riguardo la creazione di un nuovo profilo partendo da un altro file Aggiunta la mailing list alla documentazione

Per maggiori informazioni e per il download del programma nonchè la relativa documentazione visitate il sito ufficiale.

Puoi scaricare il file da qui konserve0.10.tar.gz

Here are some screenshots from Konserve

The Preferences dialog that can be used to configure the creation of backups:

The three pages of the wizard:

Kdar, ottimo frontend per il backup/restore in Kubuntu rilascia la versione 2.0.8

Kdar è un ottimo strumento per la sincronizzazione di cartelle e quindi in un certo senso per la creazione di backup differenziali.

E’uno strumento meno sofisticato di kdiff3 ma fa bene il suo lavoro.

In particolare segnalo le opzioni di slicing (per creare backups divisi in porzioni pari ad esempio alla grandezza di un CD o un DVD) e l’opzione di export del comando dar equivalente.

Infatti kdar è un frontend per il ben noto tool dar e si mostra quindi un ottimo esempio di come una GUI dovrebbe facilitare e non ostacolare la scoperta della linea di comando.

Ultima versione stabile rilasciata: 2.0.8 del 31/08/2009.

Screenshots

L'immagine “http://www.ubuntugeek.com/images/dar/6.png” non può essere visualizzata poiché contiene degli errori.


Se ti è piaciuto l'articolo , iscriviti al feed cliccando sull'immagine sottostante per tenerti sempre aggiornato sui nuovi contenuti del blog:


Ultimi post pubblicati

Vacanze    TUI.it

Universo Linux

New features in Hardy Heron

http://alaingonza.com/wp-content/uploads/2007/08/ubuntu_heron.jpg
Approfondito esame di tutte le novità che riguardano Hardy Heron, la prossima distribuzione Ubuntu 8.04 LTS, dal Hardy Hardware Detection al GDM Face Browser, Firewall, Auto Detection of Monitor Frequence, Slick Boot ed altro ancora.

iBackup, per un backup completo di Linux


iBackup è un programmino tanto semplice quanto utile per fare il backup di tutto quello che abbiamo nel nostro sistema UNIX (Solaris, BSD, Linux): preferenze, file, mail, gallerie di iPhoto, libreria di iTunes, insomma proprio tutto, ve lo consiglio davvero!

Installation on Debian
Debian does provide packages for testing and unstable.
apt-get update && apt-get install ibackup
cp /usr/share/doc/ibackup/examples/ibackup.conf /etc

Dependencies
GNU Bash (recommended)
OpenSSH (recommended)

Restore from a backup
Following command restores the complete etc directory to /
cd /
gzip -dc silverhorse_15011963_1459.tar.gz | tar -xvf - etc

How to use rsync with IBackup

In order to use this powerful utility with your IBackup account, please follow these steps:

  • Install rsync, if it is not already installed on your UNIX or Linux computer from rsync's website: http://rsync.samba.org

  • To backup a directory to your ibackup account, run the following command from the shell:

    $ rsync -r -v -z -t @rsync.ibackup.com::ibackup

    For example, to backup the directory /home/data to your IBackup account with the username say john, you would run:

    $ rsync -r -v -z -t /home/mydata john@rsync.ibackup.com::ibackup

    You will be prompted for your IBackup password, Enter your IBackup Password.

  • If you do not wish to be prompted for a password, you may set the following shell variable to your IBackup password and run the rsync command:

    $ export RSYNC_PASSWORD=

  • Connections through rsync are not secure by default. However, you may secure your rsync connection to IBackup using SSL by running stunnel.

    Run Stunnel on your UNIX or linux server:

    $ stunnel -c -d localhost:2000 -r rsync.ibackup.com:5000

    and then run rsync through your local stunnel to encrypt the connection to IBackup using SSL.

    $ rsync -r -v -z -t /home/mydata john@localhost::ibackup --port=2000

    While you may use any port for your localhost instead of 2000, you need to use port 5000 for the remote stunnel connection to IBackup's rsync server.

    If you are behind a firewall, setup your firewall to allow port 5000.

    If you use /etc/hosts.allow method to control IPs that have access to certain services on your linux server, make sure you add an entry as follows:
    ALL: 127.0.0.1

  • You may also schedule rsync to run on a regular basis using cron, the standard scheduler for UNIX.


Ultimi pubblicati categoria Backup
Backup Links

g4u, Ghost for Unix per clonare il nostro hard disk su altri PC attraverso un server FTP.

Software estremamente compatto che consente di effettuare una copia (“clone”) di tutto il contenuto di un disco fisso su un altro hard disk. Permette anche di creare un'immagine completa del materiale memorizzato su un'intera unità disco o su singole partizioni salvandola su un server FTP (attivo, per esempio, all'interno della LAN).

L'utilizzo di G4U è consigliato agli utenti più smaliziati dato che non integra alcuna interfaccia grafica ma il suo funzionamento si basa unicamente sull'uso della riga di comando.


G4U è indipendente dal sistema operativo installato: la sua immagine ISO dovrà essere masterizzata su supporto CD ROM quindi si dovrà provvedere a riavviare il personal computer assicurandosi che il boot avvenga da unità CD. Al primo avvio, G4U mostra un sunto dei comandi utilizzabili, insieme con la relativa sintassi.

Ghost for Unix è costituito da tre floppy e/o da un CD di boot e serve espressamente per clonare il nostro hard disk su altri PC attraverso un server FTP.

Download:
I requisiti per poter effettuare il download sono quelli di possedere tre floppy disk vuoti e/o un CD-R e/o un CD-RW. L'immagine dei floppy la trovate in forma compressa all'indirizzo copia compressa oppure potete trovare i tre floppy agli indirizzi floppy 1 , floppy 2 , floppy 3 , mentre per quanto riguarda l'immagine del CD la potete trovare agli indirizzi Copia compressa, Immagine ISO, se volete poi potete anche trovare i sorgenti all'indirizzo Sorgenti.

Utilizzo

Per prima cosa bisogna procedere alla creazione dei tre floppy, in ambiente Linux basterà un
cat g4u-2.2-1.fs >/dev/fd0
per creare il primo floppy, oppure se vogliamo usare il CD, basterà masterizzare l'immagine ISO per creare un CD bootable. A questo punto abbiamo a disposizione un CD con dentro un mini sistema operativo BSD e con i comandi che ci servono per poter effettuare il backup. Procediamo ora con l'utilizzo del CD, anche se per i floppy disk il discorso è analogo. Riavviamo quindi la macchina, inseriamo il CD ed eseguiamo il boot da CD. Durante il boot ad un certo punto il sistema andrà alla ricerca di un server DHCP con il quale poter assegnare un IP valido alla scheda di rete. Se nella nostra LAN non è presente alcun server DHCP allora dovremo impartire un CTRL+C per poter far terminare la ricerca e al prompt
g4u>
dovremo inserire i comandi per assegnare staticamente l'ip della macchina, la netmask e l'eventuale gateway se vogliamo trasferire l'immagine compressa del nostro disco fuori della nostra LAN.

Assegnazione indirizzo ip statico
Eseguiamo
ifconfig -a
in questo modo potremo vedere i dispositivi ethernet riconosciuti e supponiamo che il nostro sia qualosa come ex0, non dimentichiamo che siamo in ambiente BSD e la nomenclatura dei dispositivi è diversa da Linux. Eseguiamo ora
ifconfig ex0 1.2.3.4 netmask 255.255.255.0
dove 1.2.3.4 è l'ip statico che vogliamo assegnare alla macchina. Aggiungiamo poi il gateway con
route add default 2.3.4.5
dove 2.3.4.5 è l'ip del gateway.


Trasferimento Immagine
Eseguiamo il comando
disks
con il quale vediamo i dischi presenti sulla macchina e supponiamo che wd0 sia il disco di cui vogliamo trasferire l'immagine. A questo punto sul server ftp creiamo l'utente install con password install ad esempio.
Eseguiamo :
uploaddisk ip_server_ftp myimg.gz wd0
e inizierà la copia del nostro disco verso il server FTP. Se invece il server ftp non possiede l'utente install, allora dovremmo eseguire:
uploaddisk nome_utnte@ip_server_ftp myimg.gz wd0

Ripristino Immagine
Per ripristinare l'immagine bsterà eseguire:
slurpdisk ip_server_ftp myimg.gz wd0
e il gioco è fatto.

Conclusioni
Per visualizzare gli altri comandi basterà digitare al prompt
g4u>
il comando help.
g4u è un programma molto ultile qualora si devono fare delle installazioni in serie di PC, siano esse installazioni linux,Bsd o altro.
Per ulteriori informazioni : http://theatomicmoose.ca/g4u/


fonte: enricopirozzi
Un completo tutorial lo trovate in questa pagina


Se ti è piaciuto l'articolo , iscriviti al feed cliccando sull'immagine sottostante per tenerti sempre aggiornato sui nuovi contenuti del blog:


Ultimi post pubblicati

Vacanze    TUI.it

Universo Linux


Random Posts

I miei preferiti in Instagram

Archivio